
How Windows Assigns and Changes Drive Letters
Author: Michael J. Leaver, 2BrightSparks Pte. Ltd.
Windows automatically gives each storage device, i.e. internal drive or external USB stick, a drive letter. This makes it convenient for the operating system, and people, to locate the storage device. Because this is automatic, you will occasionally have to manually change drive letters to prevent conflicts or maintain consistency, especially if you are using backup or synchronization software.
This article explains how Windows handles assigns and changes drive letters, what causes a drive letter to change, and how you can rename or change a drive letter using built-in tools like Disk Management and the command prompt.
Why Are Drive Letters Used?
Other operating systems, i.e. Linux, do not utilize drive letters but mount-points. A mount-point is basically where a directory (folder) mounts to another storage device. What the majority of individuals are unaware of is that Windows can also mount drives to directories by utilizing Junction (Reparse) Points.
Windows has drive letters since it is MS-DOS-based, and MS-DOS was CP/M-based (a widely used operating system during the late 1970's and early 1980's). Windows continued the practice of using drive letters for compatibility. The boot drive still has a default drive letter of C: to this day, since the floppy drives were reserved for the drive letters A: and B:.
How Windows Assigns Drive Letters
By default, Windows uses the first available drive letter from D:, as the C: drive is typically reserved for the system partition. When you insert a new storage device, Windows uses an internal algorithm to choose the next available letter. Although automatic, this can become arbitrary if storage drives are continually added (attached/mounted) and removed (detached/unmounted). Due to the randomness of drive letter assignment, some users like to assign drive letters themselves to prevent problems such as:
- Applications and games failing to locate files
- Backups targeting the wrong path or drive
- Network drive mappings being overwritten
- Broken shortcuts
Why a Drive Letter May Change
There are several possible reasons for drive letter changes:
- The drive was connected to a different USB port
- Windows was reinstalled or updated and reset the storage configurations
- The drive was connected to another system with conflicting letter assignments
- The drive letter is already being used by another storage device
If your Windows drive letter changed unexpectedly, any software that relies on specific paths may not function correctly. You can avoid this issue in SyncBack, for example, by using variables or the volume GUID (instead of the drive letter).
How to Change a Drive Letter Using Disk Management
The simplest way to change drive letters is by using the Disk Management interface:
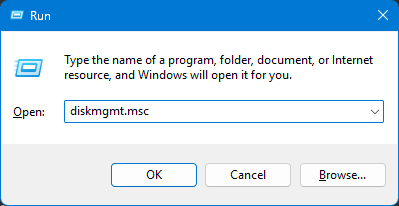
- Press Windows + R, type diskmgmt.msc, and press Enter.
- Right-click the volume you want to change.
- Select Change Drive Letter and Paths.
- Click Change, then choose a new letter from the drop-down.
- Click OK and confirm any prompts.

This method is especially useful if you want to rename a drive letter to maintain consistency across multiple devices.
Using Command Prompt to Assign or Swap Drive Letters
Advanced users can use the diskpart utility via the command prompt to assign drive letters or even swap drive letters between volumes:
- Open the command prompt elevated (as an administrator).
- Type diskpart and press Enter.
- Type list volume to view all volumes.
- To select a volume type: select volume X (replace X with the correct number).
- To assign a new drive letter: assign letter=Z (replace Z with your desired letter).
- To remove a drive letter: remove letter=Z (replace Z with the appropriate drive letter)
- To swap drive letters between two volumes, remove both letters, then reassign them in reverse order.
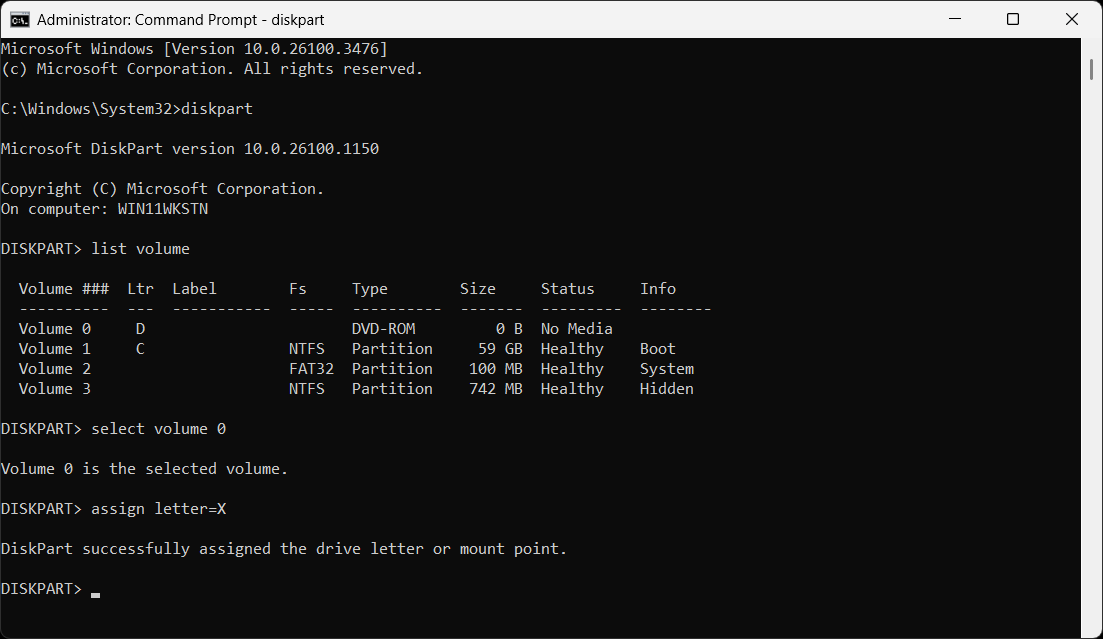
Be very careful when using diskpart, especially with system or recovery partitions. Changing the drive letter of the system (boot) volume can cause Windows to become unbootable. Avoid modifying drive letters for system or recovery partitions unless you're fully aware of the consequences.
Best Practices
To avoid problems:
- Avoid assigning drive letters that may conflict with network drives.
- Reserve consistent letters for external drives used in backup or synchronize tasks.
- Keep system and recovery volumes on default letters unless absolutely necessary.
By understanding how Windows handles the allocation of drive letters, and how to change a drive letter when needed, you can sidestep common issues on a daily basis. Using either Disk Management or the command line, these built-in Windows tools offer flexibility to effectively control your storage drives.
Explore the features of SyncBackPro to see how it can meet your backup and synchronization needs, and avoid issues with drive letter changes.
Frequently Asked Questions (FAQ)
How do I change a drive letter in Windows?
You can modify a Windows drive letter using Disk Management or the command prompt. In Disk Management, right-click the drive, select Change Drive Letter and Paths, and click a new letter. Or, in the command prompt, use diskpart to manually assign or remove letters.
Why did my drive letter change?
Drive letters can change when plugging a device into a different USB port, after a reinstall or update of Windows, or by plugging the same device into different systems. Windows will assign the next available drive letter automatically, and it will not necessarily always be the same. It must be manually assigned unless otherwise stated.
Can I rename a drive letter?
Yes, you can reassign (rename) a drive letter by using Disk Management or diskpart command at command prompt. Windows doesn't provide support for changing the letter itself, but you can assign a new one.
How do I assign a specific drive letter permanently?
To permanently assign a drive letter, use Disk Management and select a letter that is not common and will not interfere with others.
Can I swap drive letters between two drives?
Yes. With diskpart in the command prompt, you are able to delete drive letters on both drives, then reassign them in reverse order. Try to avoid altering system or recovery drives during this process.