
Secure Credential Management with SyncBackPro Secrets Manager
Author: Swapna Naraharisetty, 2BrightSparks Pte. Ltd.
SyncBackPro’s Secrets Manager facilitates the secure retrieval and management of sensitive data such as usernames, passwords, and private keys from leading secrets managers, including AWS Secrets Manager, Azure Key Vault, Google Cloud Secret Manager, Windows Credential Manager, and HashiCorp Vault. By integrating with these services, SyncBackPro ensures that your credentials are accessed securely and used directly within your backup operations, without the need to store them in SyncBackPro's profile settings. This centralized approach provides enhanced security and streamlined management of your confidential information.
Secrets Manager is only supported in SyncBackPro. It is not available in SyncBackSE and SyncBackFree.
Important Points to Note
- SyncBackPro only requires read access to your secrets manager to list and retrieve secret values. It does not create, delete, or modify any secrets stored in the secrets manager.
- The secret's value is never displayed to the end user or stored locally. Only the connection details for the secrets managers and the specific secrets to be used are stored in the program settings.
- Secret's are not cached locally, meaning they are retrieved from the secrets manager every time they are required.
- The remote secret must be in plain text or JSON format.
- Before connecting to your secrets manager, please ensure that it contains secrets.
Using Secrets Manager
In this example, we will connect to Windows Credentials Manager and define a secret for use in SyncBackPro. This assumes that you already have credentials stored in the Generic Credentials section of the Windows Credentials Manager.
- Run SyncBackPro, click on the burger menu
 and select Secrets Manager.
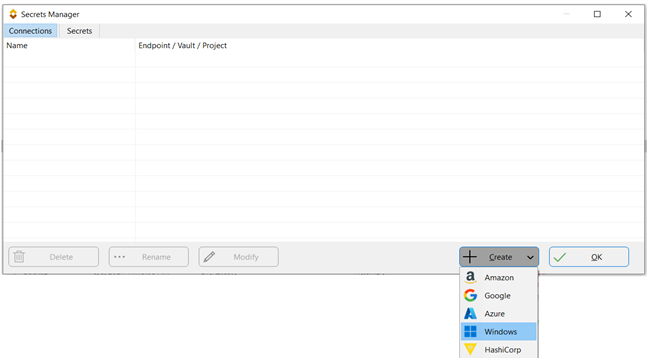
 - On the Connections page, click the Create button and choose Windows from the dropdown menu.
- Enter the name you would like to give to the connection (e.g. Windows connection), and the connection to your Secrets Manager will be established. Please note that the connection details you need to enter will vary based on the type of secrets manager you select. For more information, refer to the Help file under the Secrets Manager page.
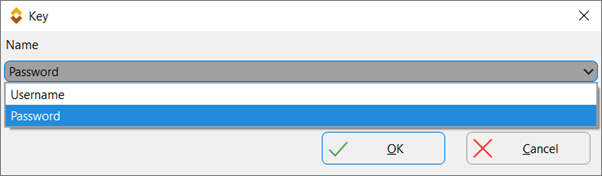
- Navigate to the Secrets tab, click the Create button, and select the type of secret you wish to use. The three types available are Usernames, Passwords, and Private Keys. In this example, we will choose Password.
- A window will appear prompting you to provide the Name, Description, and Key Name:
- Name: This is the name of the secret stored in the secrets manager.
- Description: If a description exists for the secret in the secrets manager, SyncBack will retrieve it. Otherwise, you can enter your own description of the secret.
- Key Name: If the secret is stored in JSON format or as key/value pairs, you must specify which key to retrieve the secret from. For example, a secret might contain both a username and a password, so you need to indicate which key holds the relevant value.
- Click the OK button, and the secret is defined.
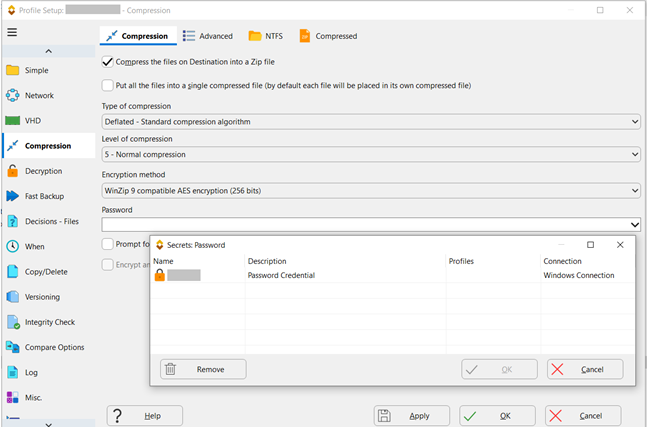
- Next, we will use the secret as an encryption password in a backup profile to store the files as encrypted on the destination. Modify the profile, go to Compression > Password, click the dropdown menu, and select Use a Secret.
- Click the name of the secret and click the OK button.
- Save the settings and run the profile. SyncBackPro will use the secret configured on the Compression page to encrypt the files.
Conclusion
The Secrets Manager streamlines the management of sensitive credentials by offering a centralized, secure solution. By leveraging a Secrets Manager, you can significantly reduce the risk of data breaches while ensuring compliance with your company’s security protocols.
Noted Customers
© 2003-2026 2BrightSparks Pte. Ltd. | Home | Support | Privacy | Terms | Affiliate Program