
How to Backup to Google Drive
Author: Michael J. Leaver, 2BrightSparks Pte. Ltd.
SyncBackPro can backup, restore and synchronize files with a number of cloud services, including Google Drive. In this article we'll show how to create a profile to backup to Google Drive.
Creating a Google Drive Client ID and Client Secret
- First, download and install SyncBackPro if you don't already have it
- The following video explains how to create a Google Drive Client ID and Client Secret. These are used by SyncBackPro to access your Google Drive files. They are similar to a username and password:
- Once you have a Client ID and Secret, you need to enter them into SyncBackPro, which is explained in the following video:
Creating a backup profile
- Run SyncBackPro and click the New button to create a new profile:

- Enter a name for your profile, e.g. Backup to Google Drive, and click Next
- We are going to do a backup, which is the default, so click Next
- Change the Destination to Google Drive (Use my account) then click Next:
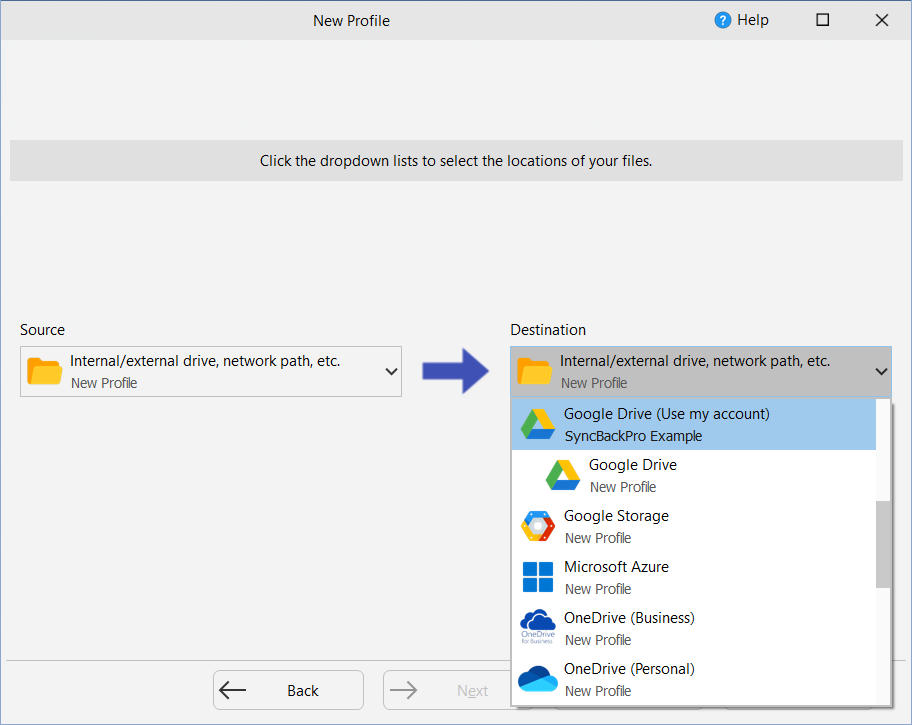
- You may now get a prompt telling you that a window will open where you can change the profile. Click OK

Choosing
- Now we can choose which files we want to backup to Google Drive and where on Google Drive we want them stored. To do this click the folder icon in the Source edit box:
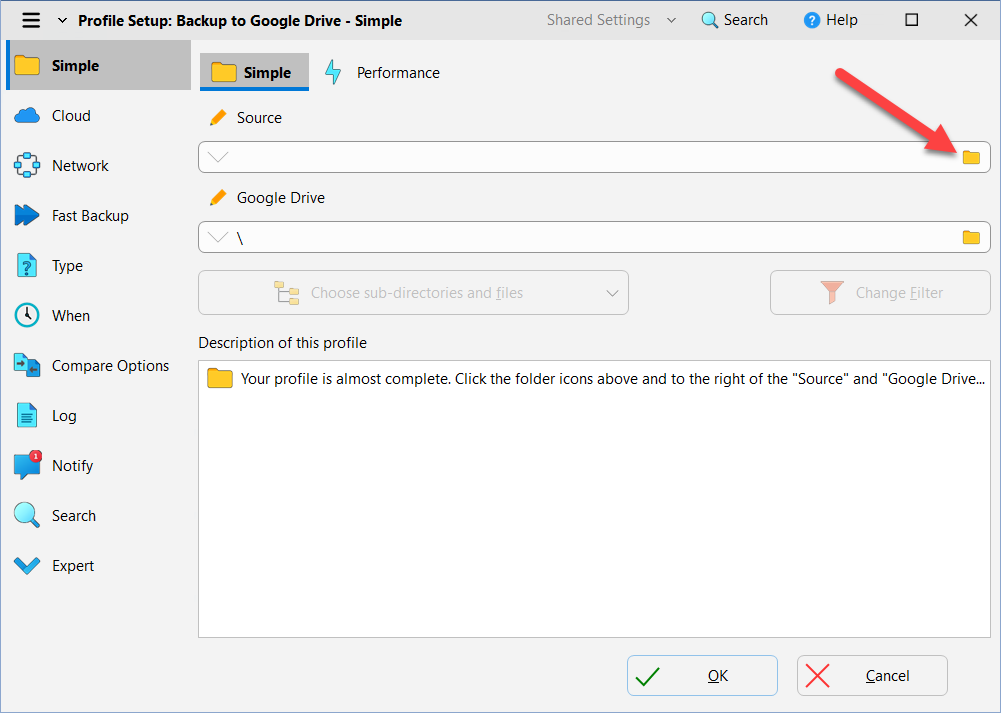
- In this example we'll choose the C:\ drive and select a folder on it. So after selecting your folder, and returning to the Profile Setup window, we are going to click the Choose sub-directories and files button:
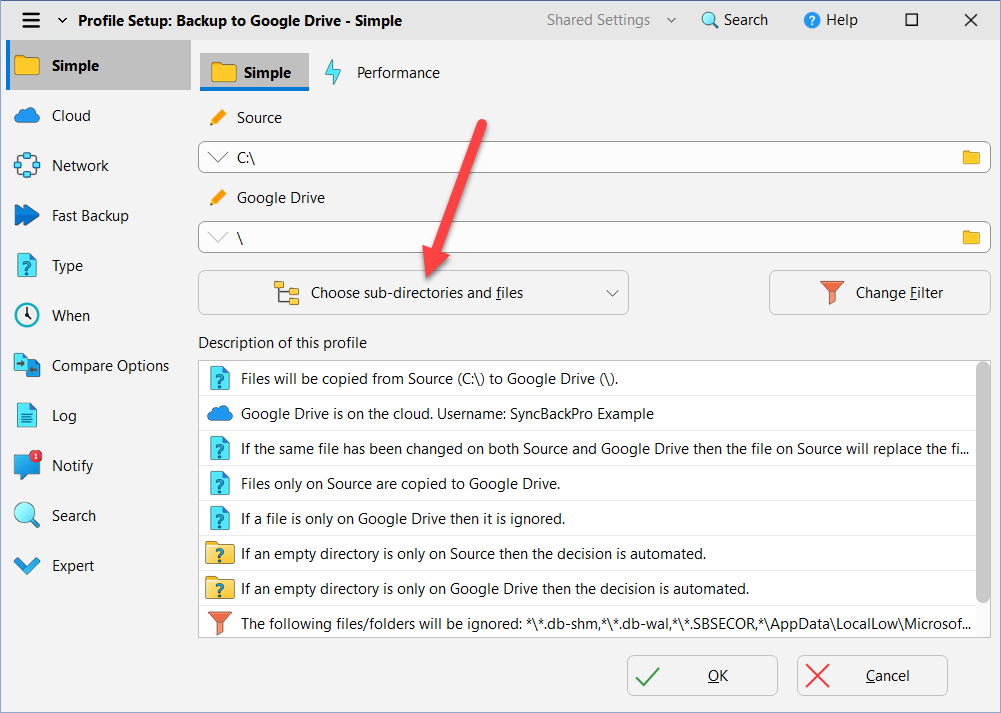
- We don't want to backup our entire C:\ drive, so we untick the root (\) which will untick everything under it:
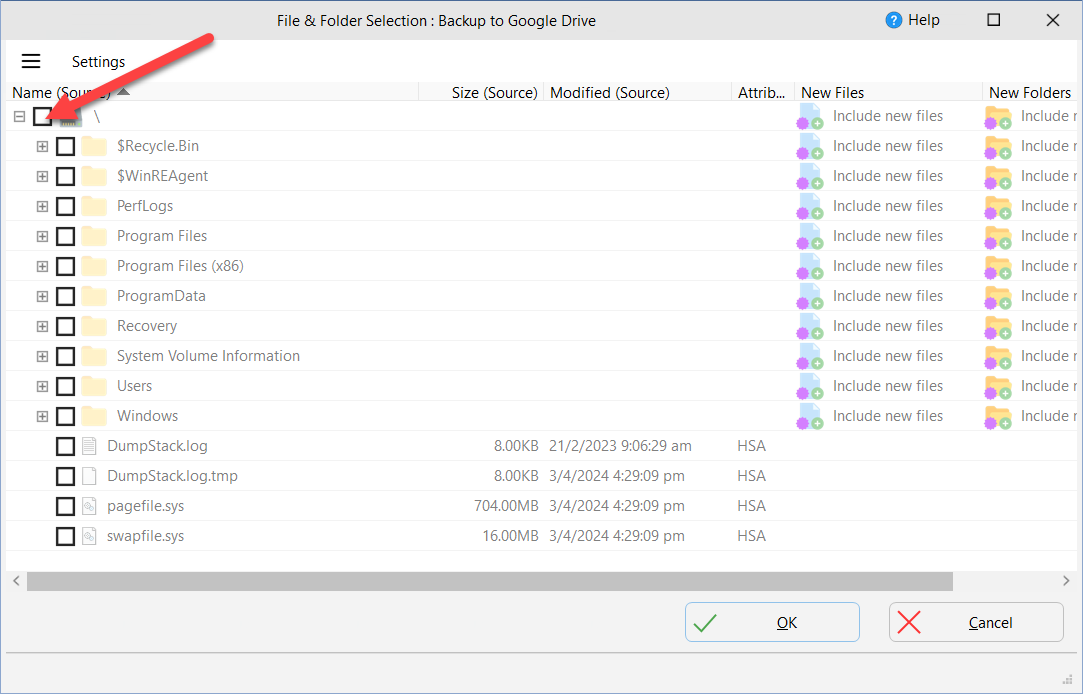
- Next we select the folder we want to backup. In this example we're just choosing one folder but you can of course select multiple folders and files:
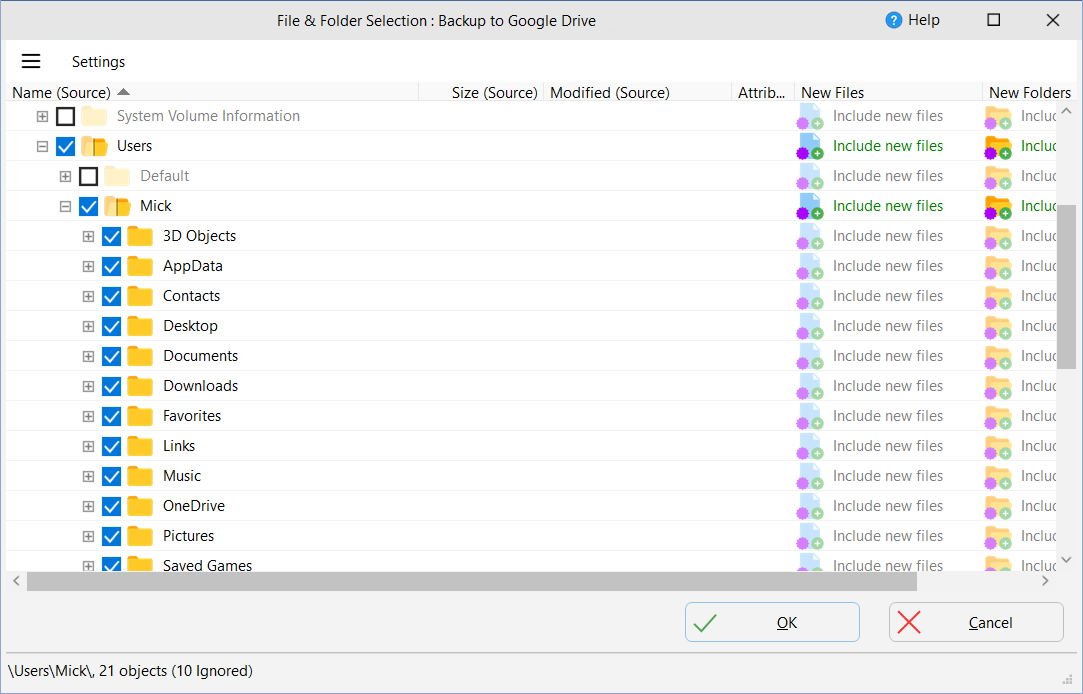
- Once you've made your selections click the OK button to close the File & Folder Selection window
- You can also change where to backup your files to on Google Drive (by clicking the folder icon next to the Google Drive button or simply typing in a path)
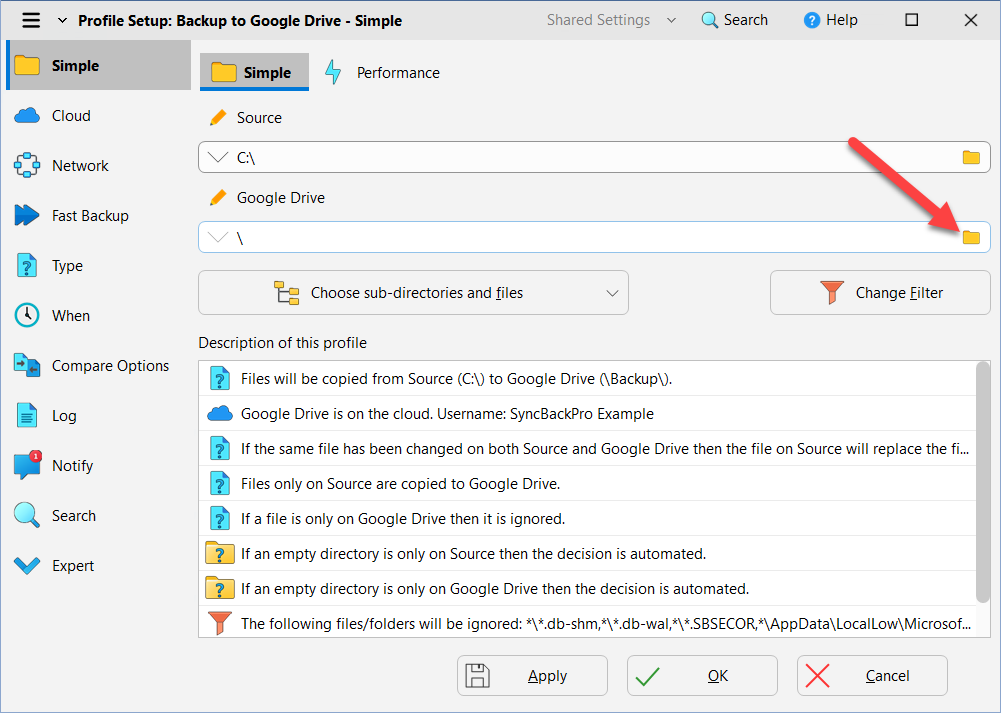
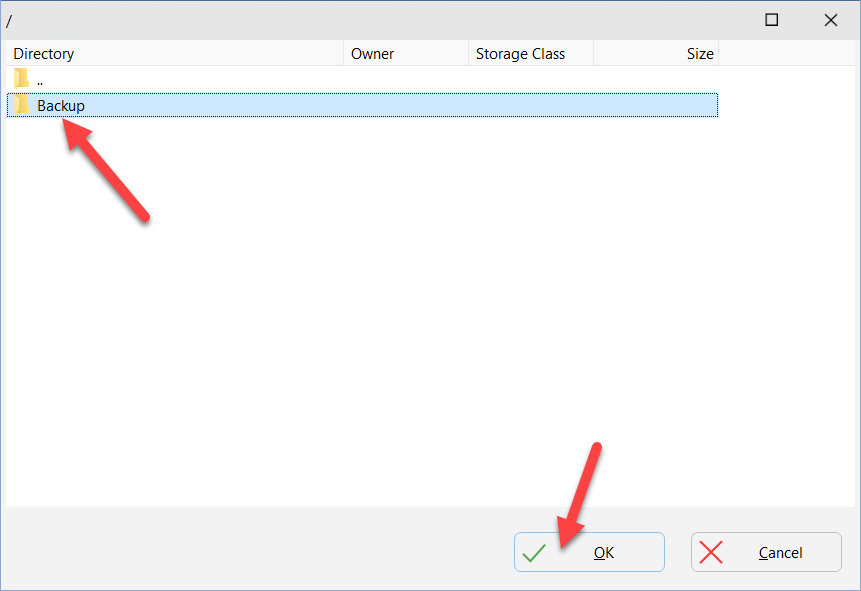
- In this example we'll backup to the folder \Backup\ on Google Drive. We should first create the folder in Google Drive. To do that, click the folder icon in the Google Drive edit box.
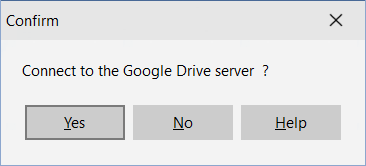
- You'll then be asked if you want to connect to the Google Drive server. Click Yes.
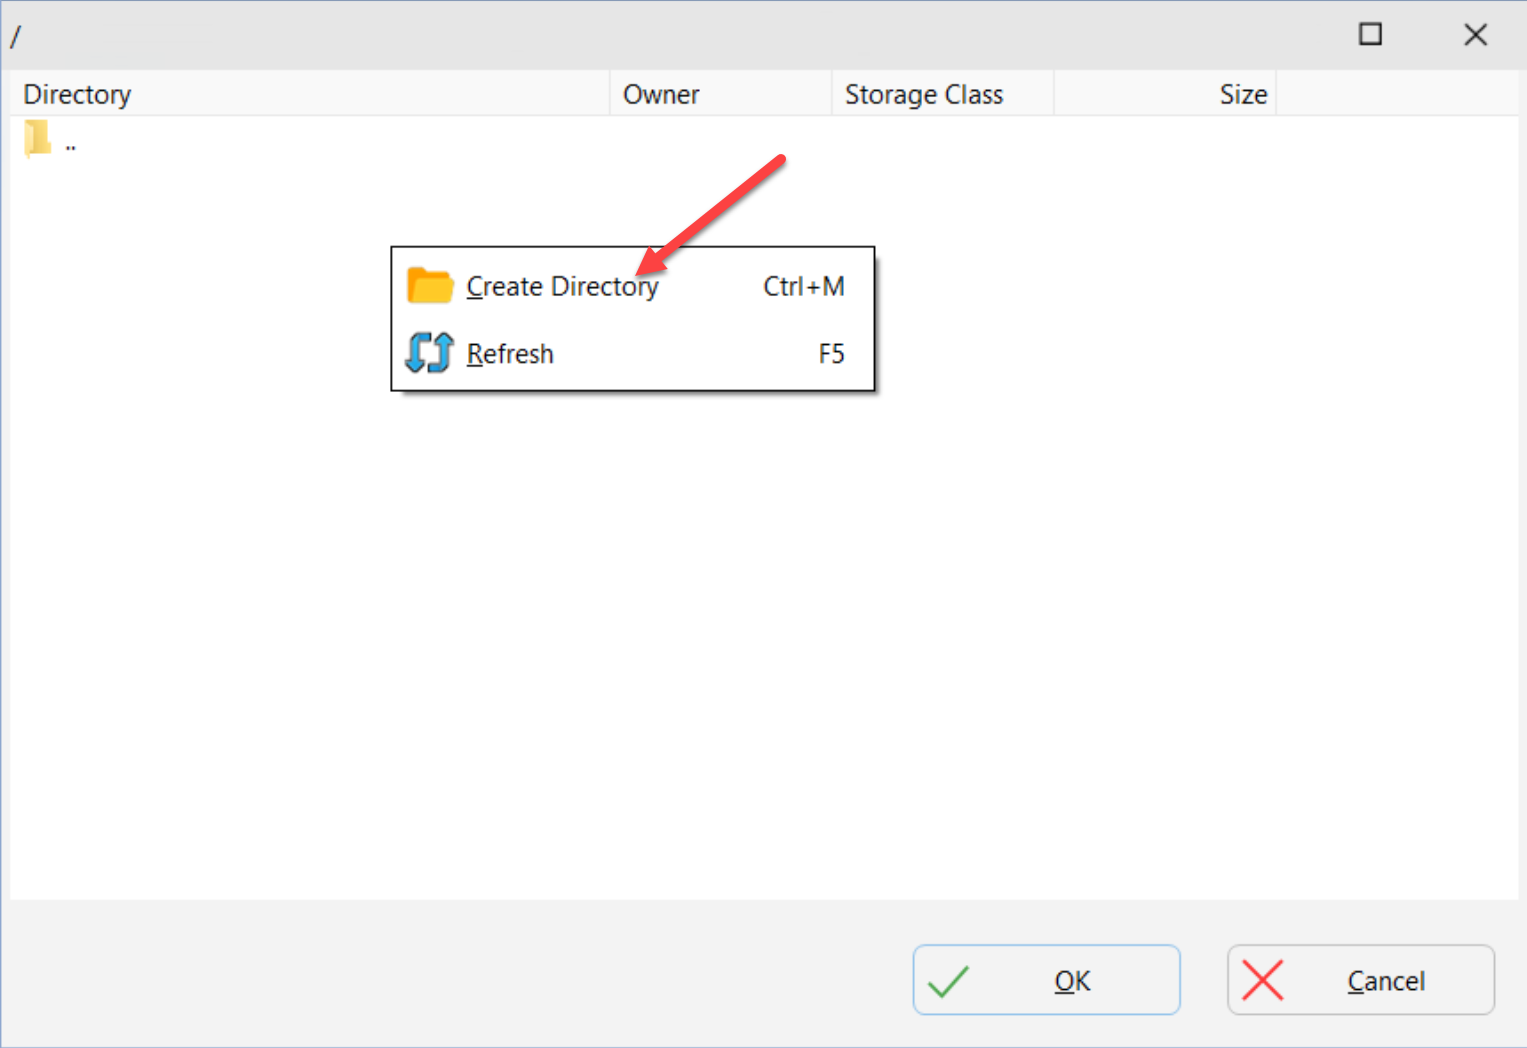
- Once SyncBackPro has connected to Google Drive, you are shown what folders already exist in Google Drive, if any. To create a new folder called Backup, right-click and select Create Directory from the pop-up menu or press Ctrl-M.
- When prompted for the new folder name, enter Backup and press OK

- Select the Backup folder and click OK:
- You now have a profile to backup your selected files to a folder in Google Drive called Backup:
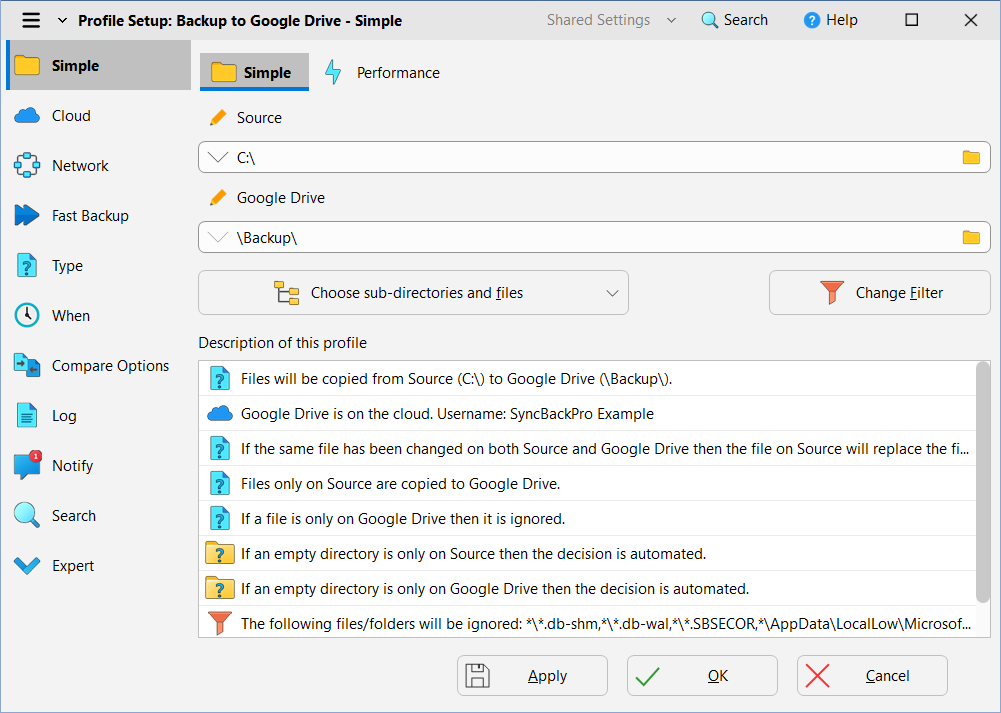
- There are many other things we could do, e.g. enable versioning, but in this example we'll just do a simple backup, so click OK to close the Profile Setup window and return to the main window
Running
- A prompt will appear asking you if you would like to perform a simulated run for this new profile:

- A simulated run does a test run which does not delete or change any files. It gives you a chance to make sure everything is set correctly before performing the backup for real. Click Yes to make sure everything is set correctly.
- SyncBackPro will now connect to your Google Drive account, scan it, and see which files need copying to it:
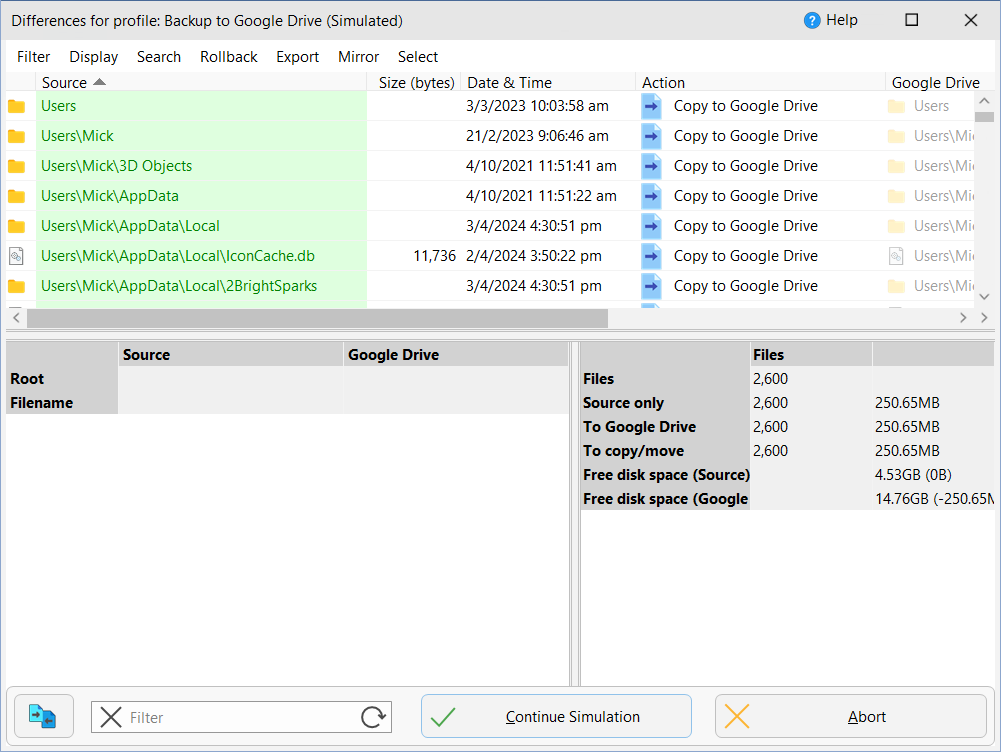
- As this is a simulated run nothing will actually be copied or deleted. Click the Continue Simulation button.
- Assuming everything was correct, and you don't need to make any changes, you can now run the profile for real and make a backup of your files. To do this select the profile in the main window and click the Run button.
- You can easily create a set & forget backup by selecting the profile and clicking the Schedule button. For example, you can have the profile run every morning at 9am. When a profile is run via a schedule there won't be any prompts. It will be done in the background without any interruptions or prompts.
Google Drive
File size limits depend on whether the file is a Google Docs file or not and the type of Google Docs file. Files that are not Google Docs files are limited to 5TB in size.
Google Drive is tightly integrated with the Android and Chrome operating systems and also Google Docs. Google Docs provides a way to create office files (documents, spreadsheets, etc.) online and to share them with others.
Conclusion
SyncBackPro supports not only Google Drive backups, but also Amazon S3™, Google Storage™, Microsoft Azure™, Microsoft OneDrive™, OneDrive for Business (Office 365), SharePoint™ (Office 365), Dropbox™, Box, SugarSync™, OpenStack, Backblaze™ B2, OVH™, Egnyte™ and WebDAV. It can not only backup online your files to a cloud service but also backup your cloud service. For example, you may want to backup the photos that your phone uploads to Dropbox automatically. Files can also be uploaded encrypted and compressed for added security. SyncBackPro also has it's own versioning meaning you can have multiple versions of your files on cloud services that don't have their own versioning.
Noted Customers
© 2003-2025 2BrightSparks Pte. Ltd. | Home | Support | Privacy | Terms | Affiliate Program


