A Guide to Using HashOnClick
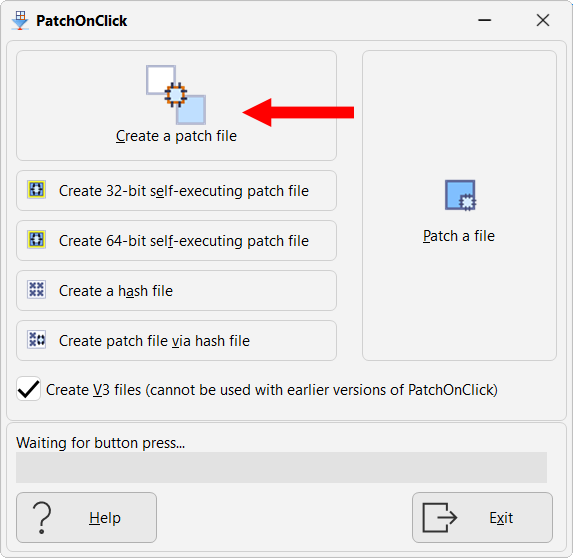
PatchOnClick is very simple to use. The main interface looks like this:

•Create a patch file: This button runs a wizard process to create a patch file.
•Patch a file: This button runs a wizard process to patch a file.
•Create 32-bit self-executing patch file: This creates an executable program that can be used on 32-bit or 64-bit Windows to patch a file. The benefit of create a self-executing patch file is that you don't need to install PatchOnClick to patch a file.
•Create 64-bit self-executing patch file: This creates an executable program that can be used on 64-bit Windows to patch a file. The advantage over a 32-bit executable is that there is no practical size to the size of the executable. The disadvantage is that it cannot be used on 32-bit Windows.
•Create a hash file: A hash file can be used to create a patch file without needing the original file. For example: you create a document, email it to someone, and then create a hash file of your document. Later you modify the document and want to email a patch file. But you no longer have access to the original document before you made the changes. This isn't a problem if you have the hash file as you can use that to create a patch file (Create patch file via hash file). Hash files are only a fraction of the size of the original file and contain no sensitive information at all (it just contains hash values which cannot be used to recreate the original file).
•Create patch file via hash file: This creates a patch file using a hash file instead of the original file. See Create a hash file above for more information.
•Create V3 files (cannot be used with earlier version of PatchOnClick): Only use the V3 format if you are creating self-executing patch files, or the person receiving the patch files is also using PatchOnClick V3, or you want smaller file sizes for the hash files and patch files. If you are using the 64-bit version of PatchOnClick then you must use the new V3 patch file format. The V3 format cannot be used with PatchOnClick V1 or V2.
•Progress bar: The progress bar shows the current process of patching or applying a path to a file.
•Help: The help button will open the PatchOnClick section in the OnClick Utilities help file.
•Exit: Closes the program.
Creating a patch file is an easy three step process with PatchOnClick.
|
Note that you will need two "source" files to create a patch. The first is your original file which you have already distributed, the second is your modified file. Creating a patch file will make a file with the extension .poc. This new file will be the differences between you original file and your modified file.
You can also create patch files using a hash file (.poch) and the modified file. |
Firstly click the Create a patch file button:

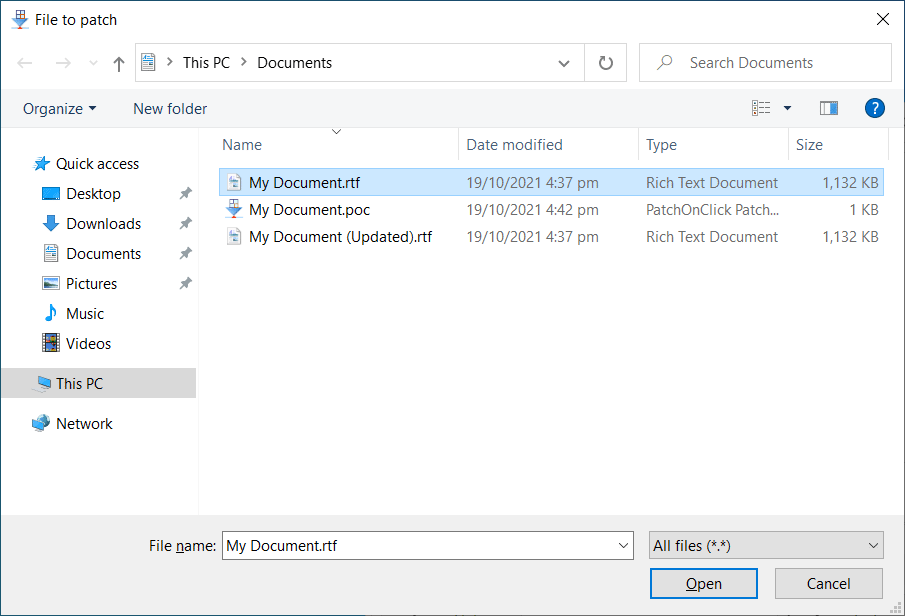
A new window will open allowing you to choose the original file using an explorer interface. The example below shows the file My Document.rtf has been selected.
|
Note how PatchOnClick shows the current purpose of the window in text at the top left. The first window is titled Original file. |

Now click the Open button. A new window will open asking you to select the modified file. In this example the file My Document (Updated).rtf has been selected:

Click the Open button. You will now be asked to browse to the location to save your patch file.
|
Note how in the example below the file name ends with the .poc extension: |

Click the Save button. The progress bar will appear as the task is completed by the program. For small patches the window will only briefly appear as PatchOnClick completes the patching process very quickly.
Congratulations! You have now created a patch file.
If you browse to the location where you saved your patch file you will see the new POC file which is significantly smaller than the updated document:
To patch a file simply click the Patch a file button on the main program interface:

A window will open asking you to select the file to be patched. The example below shows we are patching the My Document.rtf file:

Click the Open button.
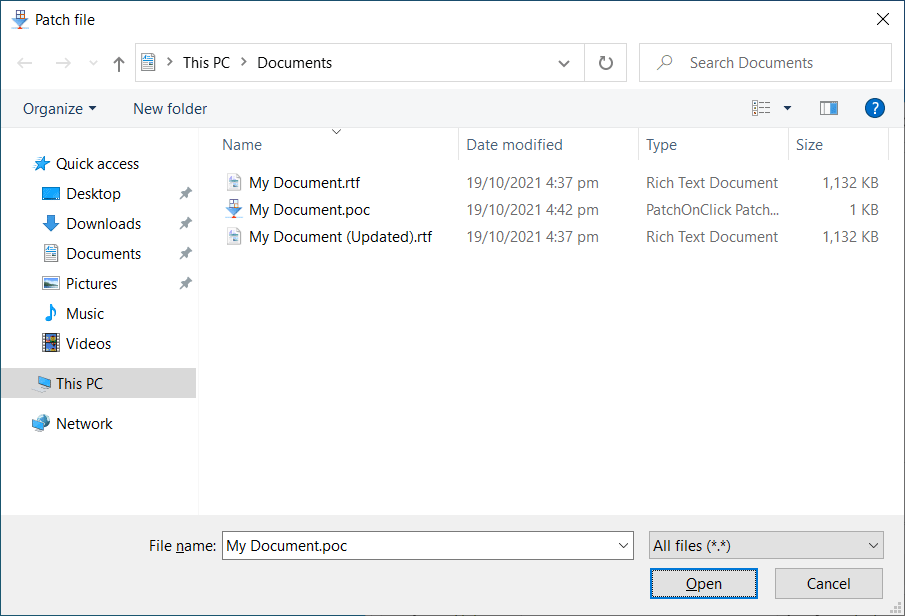
A new window will open asking you to select a patch file:

Click the Open button.
You will now need to enter a name for the file you wish to create. By default PatchOnClick prefixes the file name with Patched as shown in the example below:

Click the Save button.
Congratulations! You have patched a file.
If a file already exists for the patched file you are creating a warning dialog window will open which shows the following message:

Frequently Asked Questions
FAQs about using PatchOnClick follow on the next page of this help file.
All Content: 2BrightSparks Pte Ltd © 2003-2024
